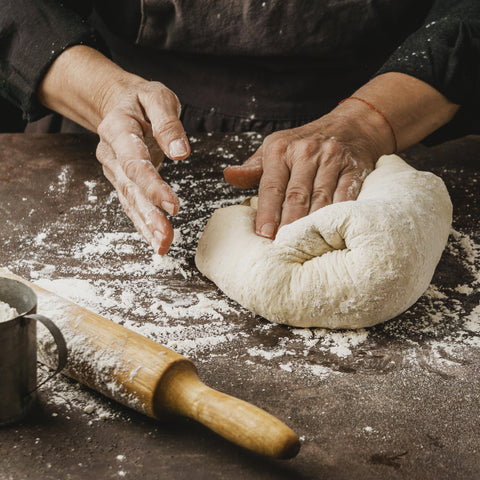
Baking homemade sourdough bread can feel almost magical. A crisp crust, chewy crumb, and tangy flavor, achieving that guitar-pluck elasticity is both art and science. The secret lies not only in patience and technique, but also choosing the best tools for baking to support each step. From maintaining your starter to shaping and scoring, accuracy and consistency elevate your loaves from decent to memorable.
And once you crack the rhythm, understanding your starter, nailing fermentation, and timing that perfect bake, it becomes a deeply rewarding ritual. Each loaf tells a story of precision, care, and craftsmanship. With the right tools and mindset, baking sourdough at home transforms from a weekend experiment into a proud, flavorful tradition worth repeating.
The Foundation: Caring for Your Starter
Conditioning the Starter With Regular Feeding
A strong starter is the backbone of reliable fermentation. Feed it daily or every 12 hours with equal parts flour and water to keep wild yeast active. You’ll know it’s ready when it doubles in volume, becomes bubbly, and smells pleasantly tangy.
Tools That Help Monitor Starter Health
Glass jars with volume marks and digital kitchen scales are among the best tools for baking your sourdough. They help view activity and ensure accurate proportions, leading to a consistently bubbly starter that yields excellent homemade sourdough bread every time.
The Secret to Good Homemade Sourdough Bread
Measuring Flour, Water, and Starter Precisely
Importance of Digital Scales
Ignoring weight for volume measurements leads to varying textures. Digital scales offer precision that spoons or cups can’t match. Getting hydration percentages just right makes your sourdough predictable and easier to troubleshoot.
Water Temperature Control
Using water between 75°F‑80°F sets the right fermentation pace. Thermometers or dual‑faucet kettles help you control water temperature consistently. That simple tool makes your dough feel neither too sluggish nor overly aggressive.
Mixing and Autolyse: Glycolysis for Dough Strength
Low-Effort Mixing Technique
After combining flour, water, and starter, allow the mixture to rest for 30‑60 minutes (autolyse). This rest encourages enzyme activity that improves extensibility. Skip aggressive mixing, it weakens gluten structure.
Timing With a Dough Scraper
Using a sturdy bench scraper makes folding and turning easier during bulk fermentation. It’s essential to develop gluten later without tearing. Your dough becomes stronger and more manageable.
Bulk Fermentation and Stretch & Fold Practice
Observing Signs, Not Clock Watching
Look for visual clues, dough volume rises by 30‑50%, visible bubbles, and some doming. Use gentle stretch and folds every 30 minutes during the first two hours for structure. Watch, don’t watch the clock.
Tools That Aid Fermentation Control
Transparent containers with markings let you track rise visually. Rubber fora and banneton baskets support dough shape while proofing. Consistent bulk fermentation prevents overproofing and ensures that perfect bloom.
Shaping, Pre‑Proofing, and Scoring
Benefits of a Dutch Oven or Cloche
Transferring your loaf to a preheated cast-iron pot or glass cloche creates trapped steam. That steam opens edges and forms a crispy crust. Pre-heating matters, it gives initial spring without delaying expansion.
Sharp Scoring Implements
Use a razor blade or scoring lame to make precise cuts that guide dough expansion. Clean, deliberate scoring creates the loaf’s final look, shapes the ear, and prevents irregular popping, critical to both appearance and crumb development.
Baking Temperatures and Steam Control
Initial High Heat
Begin baking at 475°F for the first 20 minutes with the lid on (or added steam) to achieve oven-spring. Then reduce to 425°F for crust development. That push-launch stage separates amateur from artisan.
Using Steam for Crust
If you don't use a Dutch oven, add steam using an oven-safe pan or spray. That humidity and heat produce the blistered, crunchy, glossy crust every sourdough lover seeks. Even small changes make a difference in texture.
Finishing and Cooling, Let It Rest
Cooling On a Wire Rack
Once out of the oven, let your loaf rest on a wire rack for at least one hour. This resting period lets residual moisture escape, preventing sogginess and ensuring the crumb sets perfectly. Resist the urge to slice it early.
Tools That Help Slice Cleanly
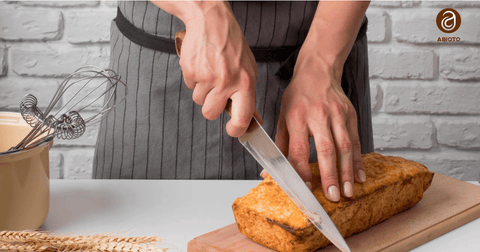
Use a serrated bread knife or an electric cutter, but only after full cooling. A jagged slicer can ruin crumb and deflate structure. Quality slicing tools matter just as much as all the earlier steps.
The Role of Baking Tools in Perfecting Homemade Sourdough
Use a Quality Dutch Oven for Steam Retention
A Dutch oven isn’t just another pot, it’s the secret to that beautiful crust. It traps steam during the initial bake, helping the dough rise and creating that signature blistered exterior. Without it, your loaf may turn out flat or dry, even if your dough was perfect. If you're serious about sourdough, this tool is worth every penny.
Digital Thermometers Help Avoid Guesswork
Internal temperature matters more than you think. Sourdough is usually done baking when it hits around 200-210°F inside. A digital thermometer removes the guesswork, especially when you're dealing with different hydration levels or altitudes. It’s a small tool that makes a big difference in consistency and quality.
Use a Bench Scraper for Easy Handling
Sticky dough can quickly become frustrating to work with. A metal or plastic bench scraper makes it easier to shape, fold, and clean up your work surface. It helps maintain your dough's integrity without tearing it, which is especially helpful during bulk fermentation.
Don’t Overlook a Good Lame or Sharp Blade
That beautiful scoring you see on bakery loaves? That comes from a tool called a lame. It helps control how the loaf expands in the oven. A sharp razor blade or lame ensures your bread opens up where it should, giving you that perfect oven spring and artistic touch.
Common Mistakes and How to Avoid Them
Dough Too Wet or Too Dense
Over-hydrated dough can collapse; too tight a mix yields dry crumb. Always adjust with small hydration tweaks. A little less water for humid days—or extra flour for open crumb, improves results.
Ignoring Starter and Fermentation Signs
Ignoring your starter’s health, fermentation cues, or temperature can lead to underproofed, gummy, or flat loaves. Learn to rely on sensory signals, smell, movement, structure, rather than fixed times.
Elevate Your Baking with Abioto
Are you ready to master your sourdough? At Abioto, we offer the best tools for baking, from digital scales and proofing baskets to precision knives and bannetons, to help you bake consistent homemade sourdough bread that rises in beauty and flavor.
Contact us today to explore our curated baking tool sets and accessories. Let’s bring the confidence, consistency, and joy of artisan baking into your home kitchen.
The Secret Is in the Tools, and Technique
From nurturing your starter to the final slice, each step matters. Using quality tools, scales, scrapers, proofing baskets, Dutch ovens, combined with patience and observation, reveals the secret to spectacular sourdough. You don’t need perfection, just respect for each process and the right gear to support it. The secret to good homemade sourdough bread isn’t a mystery, it’s method, time, and the best tools for baking in your hands.
FAQ’s
1. What makes sourdough different from regular bread?
Sourdough uses natural fermentation instead of commercial yeast, giving it a tangy flavor and better digestibility.
2. Why is my sourdough bread dense?
This often results from under-proofing, low starter activity, or using cold dough.
3. How long should sourdough ferment?
Bulk fermentation usually takes 4-6 hours, but times vary based on temperature and dough hydration.
4. Do I need special tools for sourdough?
Yes, tools like a Dutch oven, bench scraper, and lame improve results significantly.
5. Can I use all-purpose flour for sourdough?
Yes, but bread flour often gives better structure.


Comments (0)
There are no comments for this article. Be the first one to leave a message!