You’ve caught the sourdough bug. That first taste of a crusty, chewy bread is divine. And isn’t it more difficult than one might at first imagine? Now, what would you do if I said failure is a lot easier to avoid than you might think? With these proofing, scoring and baking tips, you’ll be pulling out perfect loaves in no time. You know: that feeling exists because these tips and tricks will help you make the best bread, every time.
So, are you ready to jump on the sourdough bandwagon and start baking your own? This blog will help you bake the best sourdough bread. Whether you’re new to baking sourdough or just looking to up your game, with time and practice, all of these tips will certainly help take yours to the next level.
How to Feed your Starter?
And do you know that a robust, thriving sourdough starter is key to making flavorful and lofty bread? Well yes, if you want to keep your starter healthy and ready for baking, you have to:
- Feed it regularly
- Use the right flour
- Monitor hydration levels
- Watch for activity
That means the best time to bake with your starter is when it’s most active. It time-lag: If your starter is over-fermented, it may not have sufficient kick which results in the dough’s strength being compromised (usually when it come out of fully rise and slightly past its limit on collapse).
Some Methods of Working the Bread Dough
Touch the Dough
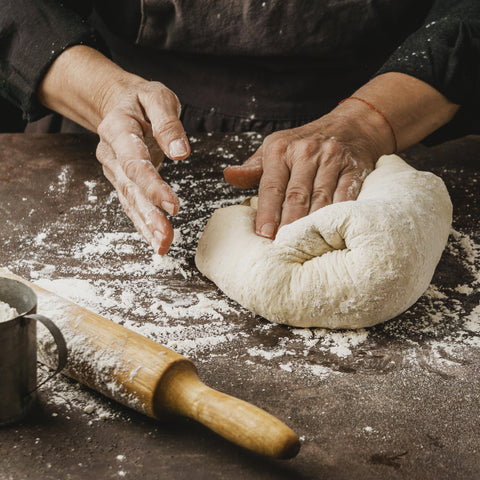
Kneading dough requires sticky hands. Wash them well before diving. You will want to flour your cookie cutters as well, so the dough won't get stuck. Kneading requires your hands, so begin.
Pull, Push, Fold
Simple kneading is primarily pressing and tugging and folding dough. Turn out dough onto a lightly floured surface. Push the ball of dough away from you with your heel, then draw it back toward you with your fingertips. Fold the dough in half, then press. Rotate the dough a quarter turn and repeat. The dough should be smooth and elastic after you’ve kneaded it. Seeds, as much flour as necessary to prevent sticking.
Actively Knead
Knead the dough hard. But it's not the chew, which is owed here to gluten that has been given a lot of time and kneading. Most sourdough recipes will ask for 10 to 15 minutes of kneading. Dough is kneaded if forms an elastic, smooth and (when you touch it) tacky ball.
Take Breaks When Required
Kneading dough works your arms! Rest when you get tired in your arms. Rest 5-10 minutes and knead it until soft, smooth and elastic. Your bread will be delicious, and your arms won’t hate you. Do you want the best homemade sourdough bread at the end?
Expert Tips for Making Homemade Sourdough Bread from Scratch Every Time
For the best sourdough bread, you want a vigorous starting. It’s incredibly rewarding and satisfying to start from zero. Here are some of the best tips for making the perfect homemade sourdough bread,
Leverage Your Sourdough Starter at Its Peak
For best results and maximum rise in your sourdough bread, you always want to use your starter at its peak. To be able to work with this, you also should be sure that the jar of sourdough starter has already reached its maximum height in the jar, and is now on a descent. 4 to 12 hours after feeding, your sourdough starter is usually at its peak and ready for use (yes, you can transfer it to a bowl and begin baking with it at this point).
Moistening the Dough Before Baking for Extra Rise
This sourdough secret is what many bread-baking pros swear by to achieve the tallest rise every time. And even if you have a Dutch oven, this little trick should help your sourdough game soar to new heights — both physically and metaphorically.
Just spritz the surface of your shaped dough with lots of water or mist generously before you bake it. This will keep the crust of your sourdough more supple for longer, which helps when you want a better oven spring and longer rise time.
CAUTION: You Must be Gentle with your Dough
Sourdough is a fragile beast and being kind to your dough will ensure the best results. We’ve all watched bakers on television manhandle dough as they shape it, but not with sourdough.
Sourdough has to be gently degassed, releasing not all of the precious gas that you’ve worked on this whole time. While some describe it as ‘punching down’ your dough, what they really mean is to make a fist and press your fist into the centre of the dough then fold the edges of the dough over and do that again. Just don’t get carried away and actually punch the dough. This would not be great for the dough, or for your bowl.
Sift Your Flour If You Want Nice-Textured Sourdough
If you’re baking your sourdough with whole wheat flour, consider sifting it to eliminate some of the bran (the heavy bits). The bran in your flour will not slice into the gluten strands throughout your bread, so those strands lose their ability to support the air within the bread. Sifting your flour, and discarding some of the bran as you do so, then will mean that more of the structure created by the gluten in your dough is retained making for a less dense sourdough loaf and resulting in something lighter to give it its rise.
Presoak Your Flour for a More Tender Loaf
If you’re aiming for a lighter loaf, soaking your flour overnight is key to softening the heaviest parts (soaking before mixing with the dough just might ensure that all of those heavier particles are softened”). That way, when you mix it into your sourdough batch, you won’t damage the gluten by slicing the strands and losing all that precious gas buildup. By doing that you will result in a lighter loaf, with more open holes (which is what you want).
Use a glass or ceramic bowl, not metal.
Make your sourdough bread in glass and ceramic bowls and containers, not metal. There are two issues that could potentially come up with the acid and the bacteria in the starter: those little start bacteria can interact with your metal or plastic and corrode it. In particular, metals such as aluminium, iron or steel can corrode or pit with acidic constituents. The same goes for your utensils; ditch that metal spoon and use only wooden or silicone utensils. At Abioto, you can absolutely achieve the finest glass and ceramic bowl for best homemade bread making.
Just be certain loaves must bake at the correct temperature. Crust color and brownness of loaf is discouraged by low temperatures. If it’s too hot, the crust burns before the middle cooks. After 30 minutes at 450 F, reduce to 350 F and bake sourdough loaves until they reach an internal temperature of 208–210 F.
OPERATION Avoid muck-ups to bake lovely sourdough bread with your favourite people fast-beautifully presented in Abioto's Bread Making Kit or Baking Kit! Exercise caution and pay attention while proofing for light, airy sourdough every time.
Take Your Sourdough Baking to New Heights With Abioto
And don’t forget here at Abioto- our top notch tools will help you safeguard your homemade sourdough bread. Looking for a gift of professional bread tools or precision dough handling products our range of products will really help you to raise your baking game.
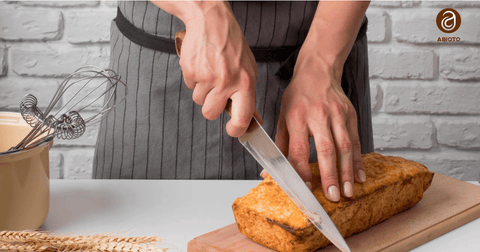
Beautiful, tangy sourdough bread: It’s all yours to make. It takes patience, good ingredients and equipment such as Abioto’s Bread Making Set. The adjustable bread cutter slices through your freshly baked, crusty sourdough creation. Show your work to relatives and friends. People are going to ask for your dish because it smells and tastes so good.
Browse our collection and bake with confidence.


Comments (0)
There are no comments for this article. Be the first one to leave a message!