

Why Proofing Baskets Are Important for Getting the Best Rise in Bread
People sometimes call the containers used to let bread dough rise for the last time "bannetons" or "brotforms."
They can be made from wood, wicker, or cane, and they come in many different shapes and sizes.
The best bread proving basket should hold the dough while it rises so that it doesn't lose its shape or structure.
The baskets also make patterns on the bread's surface, which makes it look better.
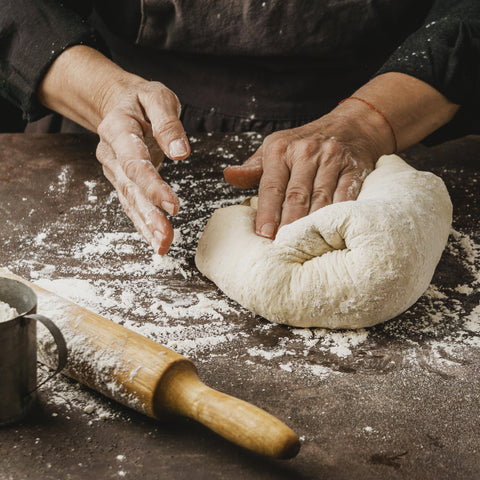
👉 It's very important to dust the inside of a bread proving basket with flour or rice flour before using it so that the dough doesn't stick.
After shaping the dough and putting it in the basket, cover it with a towel or plastic wrap and let it rise in a warm place with no drafts.
🔎 The point of our blog is to explain why proofing baskets are important for getting the best rise in bread.
Benefits of Using Abioto Bread-Proofing Baskets
There are many benefits to using bread proofing baskets, such as:
-
Shape and structure: Bread proving baskets help the dough keep its shape and structure by supporting it while it rises for the last time. Because of this, the loaf has a nice shape and a crust and crumb that are the same all the way through.
-
Visual appeal: The baskets make the bread's surface look better by adding patterns to it. The basket's unique shape can also help you tell the difference between different types of bread.
-
Easy to use: Bread proving baskets make it easier to handle the dough during the final rise because the dough is less likely to stick to the basket or change shape.
-
Results that are always the same: Using a bread proofing basket will help you bake bread more consistently. The basket provides a controlled environment for the last climb, which may lead to more consistent results.
-
Good for the environment: Wood, wicker, or cane are some of the best natural materials for bread proofing baskets. They are better than plastic or metal ones.
Using a bread-proofing basket can help you make better, more consistent bread that looks good too.
A Recipe for Rustic Sourdough Bread
You can use a proofing basket to make this simple recipe for rustic sourdough bread:
Parts:
-
500 grams of flour for bread
-
350 grams of water
-
150 grams of sourdough starter
-
Salt: 10 grams
How to:
-
In a big bowl, mix the water and flour together until they make a shaggy dough.
-
Cover the basin after it has rested for 30 minutes.
-
After the dough has rested, mix the sourdough starter and salt into it well.
-
Move the dough to a board that has been lightly floured and knead it for five to ten minutes, or until it is smooth and stretchy.
-
After putting the dough in a lightly greased basin, cover it with a cloth or plastic wrap.
-
Let the dough rise at room temperature for two to three hours, or until it has grown twice as big.
-
Put the dough in a proving basket with the seam side up and dust it with flour.
-
Put a towel or plastic wrap over the basket and leave it there for another hour or two, or until the dough has doubled in size.
-
Put a baking stone or sheet in your oven and turn it on to 450°F (230°C).
-
Once the proving process is done, carefully turn the dough out onto the baking stone or sheet that has been preheated.
-
Use a sharp knife or razor blade to cut the top of the dough.
-
Bake for 30 to 40 minutes, or until the bread's inside temperature reaches 200°F (93°C) and the crust is golden brown.
-
Let the bread cool on a wire rack for at least 30 minutes before cutting it up and serving it.
👉 When you keep the bread in a proofing basket during the last rise, it keeps its shape and structure, and the loaf comes out with a consistent crumb and crust.
Last Words
This All-Inclusive Kit has everything you need to become a master at baking bread, thanks to ABIOTO's Premium Quality Tools that make the experience amazing for our customers.
Having the best tools from the best brand makes baking bread much easier.

Comments (0)
There are no comments for this article. Be the first one to leave a message!