

If you’ve ever tried to make artisan-style bread at home, you’ve probably reached the point where your dough spreads out instead of rising upward. That’s usually when bakers start searching for a proofing bowl for bread and realize why professionals always use baskets. A good proofing basket supports the dough, keeps its shape, and gives you that beautiful structure you see in bakery loaves.
At Abioto, we’ve seen countless beginners frustrated because they skipped this one tool. Bread rising baskets aren’t just about looks; they control the shape, the strength, the final rise, and even how the crust forms. Using one properly changes your whole baking experience, especially when you’re learning. So let’s walk through exactly how to use a rising basket step-by-step.
Why a Bread Rising Basket Matters More Than You Think?
Bread dough is fragile before it bakes, especially sourdough. It’s soft, sticky, and full of air. The goal isn’t to “force” it into shape; it's to support it while it develops. A rising basket gives your dough structure during the final rise, helping it grow upward instead of outward.
Without a basket, dough tends to flatten. With one, your loaf grows tall, round, defined, and ready for the oven.
This is why bakers, from beginners to experts, eventually reach for a tool like a banneton or a dedicated bread rising basket. It stabilizes the dough, absorbs just enough moisture for texture, and encourages even fermentation.
Steps for Using the Basket for Bread Rising
Step 1: Prepare Your Proofing Basket
Before anything else, your basket needs a little prep. A raw basket won’t work well unless you create a light barrier between the dough and the fibers.
Here’s how to prepare it:
Lightly dust the inside
Use flour, rice flour, or a mix of both. Rice flour works best because it sticks less and gives a cleaner release.
Optional: add the liner
If your dough is very sticky or high-hydration, you can use the cloth liner. But many bakers prefer the natural spiral pattern the bare basket creates.
Shake out any excess
Too much flour makes a mess; too little makes the dough stick. Find a balance.
Your proofing bowl for bread is now ready.
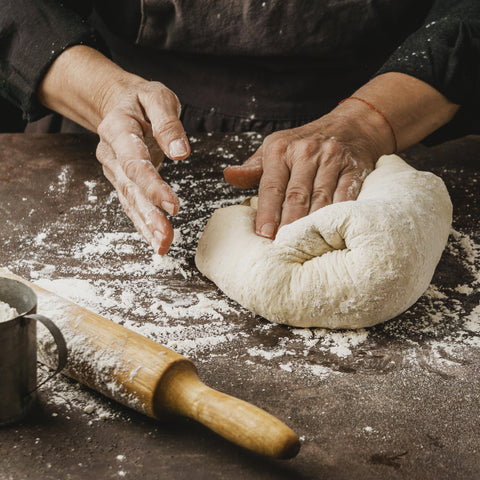
Step 2: Shape Your Dough Properly
A rising basket doesn’t fix shaping mistakes; it enhances good shaping. Before placing the dough inside, make sure you’ve built enough surface tension.
Here’s how:
-
Pull the dough toward you using a bench scraper
-
Tuck the bottom under
-
Rotate and repeat
-
Keep shaping until the surface feels tight, not loose or saggy
Good shaping helps your dough rise tall instead of slumping into the corners.
Step 3: Place the Dough into the Basket
Once your dough is shaped, gently place it into the basket seam-side up. That may feel backward, but here’s why:
-
When you flip it before baking, the seam ends up on the bottom
-
The smooth side becomes the top
-
It makes scoring easier and gives better expansion
The basket supports the dough’s shape during this final rise.
Step 4: Let the Dough Rise the Right Way
How long your dough stays in the basket depends on the recipe, temperature, and hydration. But the process is always the same.
You can choose:
Room-temperature final rise
-
Usually 1–3 hours
-
Dough becomes airy and slightly domed
Overnight cold proof (most recommended)
-
12-24 hours in the fridge
-
Creates better flavor, easier scoring, and stronger shape
During this time, the basket’s structure keeps everything neat and controlled.
Step 5: Flip, Score, and Bake
This part is where your basket pays off.
-
Place parchment paper over the basket
-
Hold the board or paper tightly
-
Flip the basket upside down
-
Let the dough release
-
Score with a sharp blade
A proper proofing bowl for bread gives you a smooth surface to score and makes the transfer effortless.
From there, bake in a Dutch oven or on a stone; your dough is already shaped and ready to spring.
What Bread Rising Baskets Do for You?
-
Support wet dough
-
Create tall, structured loaves
-
Improve final shape
-
Help the dough ferment evenly
-
Reduce sticking with proper flouring
-
Create the classic spiral pattern
-
Make scoring cleaner and easier
Once you use one, you won’t want to go back.
Troubleshooting: Common Basket Mistakes
Even with a great basket, small issues can throw you off. Here’s what most beginners struggle with:
Dough sticking
Use more rice flour, or switch to a liner until you’re comfortable.
Dough spreading
This usually means under-proofing or not shaping tight enough.
Rough release
Tap the basket gently before flipping or using parchment.
Dough collapsing
The dough is likely over-proofed and needs shorter rising next time.
Bread is a learning process. Small adjustments make big differences.
How Baskets Affect Texture and Crust?
The basket isn’t just about shape; it affects texture. As your dough rises, the basket absorbs a little moisture on the outside. That slight dryness creates:
-
A stronger skin
-
Better oven spring
-
A crispier crust
-
More defined scoring
These subtle changes add up to a loaf that looks and tastes like it came out of a bakery.
Different Types of Bread Rising Baskets
Not all baskets are equal. Some materials behave differently, and choosing the right one changes your results.
Rattan baskets
The classic option: lightweight, breathable, great for sourdough.
Plastic proofing bowls
Easy to clean, affordable, but less breathable.
Fabric-lined bowls
Good for extremely sticky dough or beginners.
Shape choices
-
Round (boule)
-
Oval (batard)
-
Long (baguette-style)
What you pick depends on the shape you want. Rattan remains the top choice because it supports dough perfectly while keeping airflow steady.
Why Abioto’s Bread Rising Tools Make Baking Easier?
At Abioto, we design tools that make the process smoother, simpler, and more enjoyable for home bakers. Our baskets are crafted for consistent airflow, easy dough release, and long-term durability. Whether you’re learning the basics or refining your craft, your tools should support your growth, not get in the way of it.
A rising basket isn’t just another item in your kitchen. It’s a tool that shapes your bread, your confidence, and your baking routine. The right basket makes every loaf better.
Make Your Next Loaf Rise the Right Way
If you’re ready to start shaping taller, stronger, beautifully structured loaves, a basket for bread rising is the tool that elevates your baking instantly. Whether you’re just starting or leveling up your sourdough game, the right basket makes the whole process easier.
Get your bread rising basket today and start baking loaves you’re proud of with Abioto
FAQs
How to use a bread rising basket?
Dust it well, place the shaped dough inside, and let it rise until ready to bake.
How does a bread basket work?
It supports the dough, keeps its shape, and helps it ferment evenly.
What is the function of a basket?
It holds dough during the final rise and prevents spreading.
How long do you leave dough in a proofing basket?
Anywhere from 1-3 hours at room temperature or overnight in the fridge.
When to use a proofing basket?
Use it during the final rise before baking to improve shape and structure.

Comments (0)
There are no comments for this article. Be the first one to leave a message!